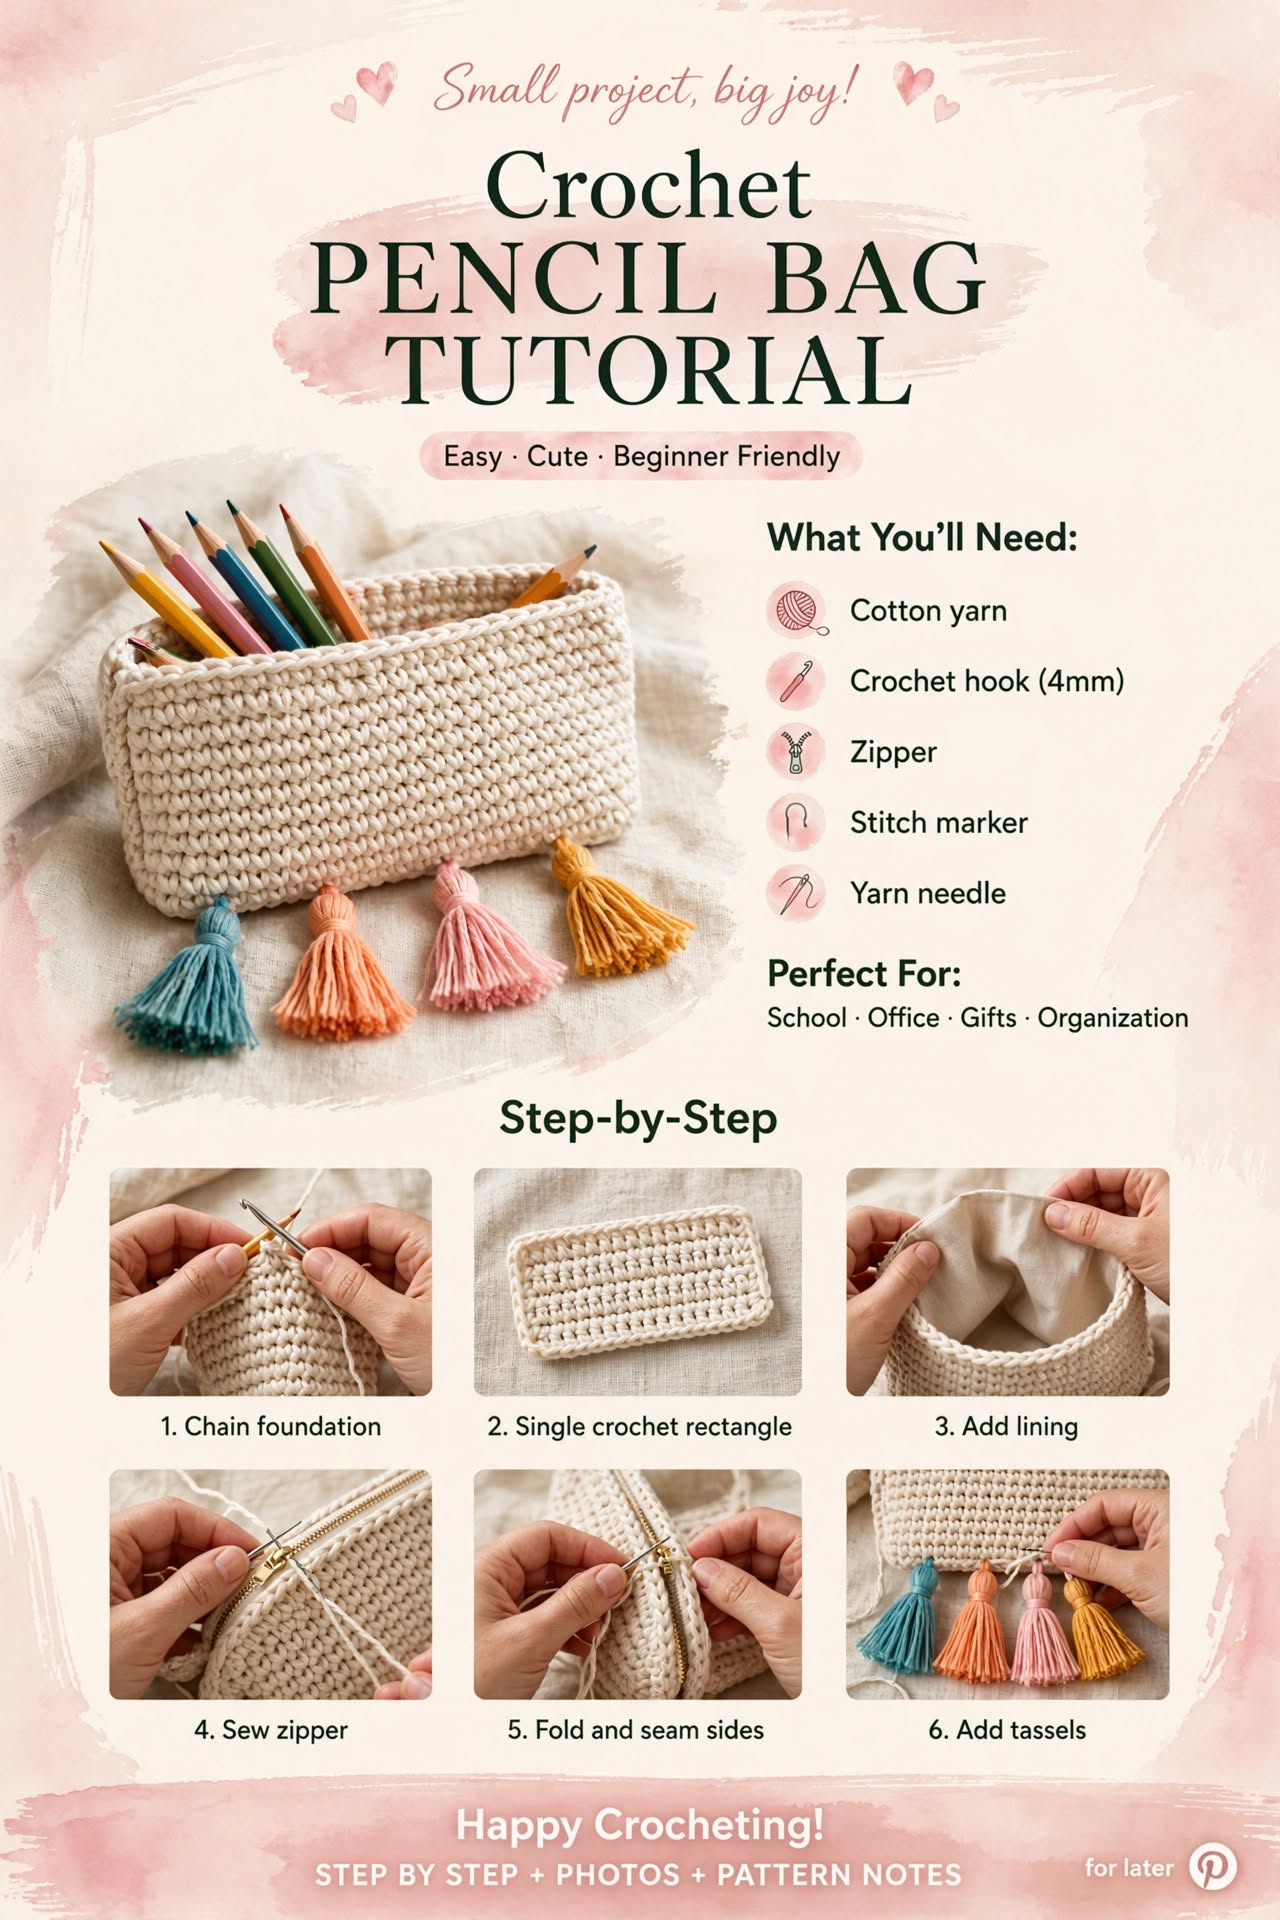
Materials
- Cotton worsted-weight yarn, about 150 yd / 137 m in your main color
- Small amounts of 4 contrasting colors for the tassels, about 5 yd / 4.5 m each
- 4 mm (G/6) crochet hook
- An 8 in / 20 cm sew-in zipper
- A piece of lightweight cotton fabric for the lining, roughly 9 x 9 in / 23 x 23 cm
- Sewing needle and thread that matches your lining fabric
- Tapestry needle
- Stitch marker
- Scissors
- A small piece of cardboard or a fork, for wrapping tassels
Finished size
Approximately 8 in wide x 3.5 in tall x 2 in deep / 20 x 9 x 5 cm, before lining is added. Cotton yarn holds its shape well and does not stretch much, so exact gauge is not critical, just keep your tension consistent across the piece.
Abbreviations
ch = chain · sc = single crochet · st(s) = stitch(es) · sl st = slip stitch · rep = repeat
Why cotton yarn for this project
A pencil bag gets tossed in backpacks, zipped and unzipped constantly, and needs to hold its shape without stretching out. Cotton is firmer and more structured than acrylic or wool, which makes it the better choice here. If you only have acrylic on hand, a firm single crochet worked slightly tighter than usual, with the added structure of the lining, will still hold up reasonably well.
Step 1: Chain the foundation
Ch 33. This foundation chain determines the width of your bag, about 8 in / 20 cm across. If you want a narrower or wider bag, chain in multiples that suit your zipper length, just make sure your zipper is roughly the same length as your foundation chain.
Step 2: Work the base rectangle
This is the single largest part of the pattern, and it is also the simplest, just single crochet back and forth until the rectangle is the right size.
- Row 1: Sc in the 2nd ch from the hook and in each ch across. 32 sc.
- Row 2: Ch 1, turn. Sc in each st across. 32 sc.
- Rows 3–20: Repeat Row 2. Count your 32 stitches at the end of every row, it is easy to accidentally add or skip a stitch at the turn, and catching it early saves you from unraveling later.
After row 20, your rectangle should measure roughly 8 x 7 in / 20 x 18 cm. This full rectangle will fold in half to form the front and back of the bag, so its finished height, once folded, becomes about 3.5 in / 9 cm.
Step 3: Add the lining
Before sewing the bag together, cut your lining fabric to roughly the same size as your crocheted rectangle, adding about half an inch of seam allowance on each side. Fold the fabric in half, sew the two side seams, and press or finger-press the top edge under. Set the lining aside, right side out, ready to insert once your zipper is in place.
Lining is optional but genuinely worth the extra step here, it keeps loose pencil shavings and eraser bits from working their way through the crochet stitches, and it gives the finished bag a noticeably more polished, finished feel when you unzip it.
Step 4: Sew in the zipper
Fold your crocheted rectangle in half, right side out, so the two 8 in / 20 cm edges meet at the top, this is where your zipper will go. Pin the zipper along both top edges, with the zipper pull centered, and using a sewing needle and thread, whipstitch the zipper tape to the crochet fabric along both sides. Go slowly here, an evenly sewn zipper is the single detail that makes the biggest difference in how professional the finished bag looks.
Step 5: Fold and seam the sides
With the zipper installed and partially unzipped (this matters, you need to be able to turn the bag right side out afterward), fold the rectangle in half along the zipper and match up the two side edges. Using your yarn and a tapestry needle, whipstitch or slip stitch each side seam closed, working from the zipper down to the folded bottom edge. Turn the bag right side out through the partially open zipper, then insert your prepared lining, tucking the folded top edge just under the zipper tape, and hand-stitch it in place around the zipper opening.
Step 6: Add the tassels
Wrap one of your contrasting yarn colors around a piece of cardboard or a fork about 20 times, then slide it off carefully. Tie a separate short length of yarn tightly around the top of the bundle, then cut through the loops at the bottom to release the tassel shape. Trim the ends even, then wrap a small separate strand around the top of the tassel a few times to form a neat head, and use your tapestry needle to attach it to the bottom edge of the bag. Repeat with the remaining 3 colors, spacing the tassels evenly across the bottom seam.
Pattern notes
If your rectangle comes out narrower or wider than expected after row 20, that is fine, just make sure your zipper length roughly matches your finished width before you start sewing. If you would rather skip the lining step, the bag will still function perfectly well without it, cotton yarn worked in a firm single crochet is naturally quite tight and holds small items well on its own.
This same base rectangle, worked slightly larger, also makes a simple cosmetics bag or a small tool pouch, just adjust your foundation chain and row count to the size you need.