Easy Crochet Baby Blanket
Make a soft, cozy baby blanket with an easy shell stitch and a delicate scalloped border. This project is simple enough for a beginner while still creating a beautiful handmade finish.
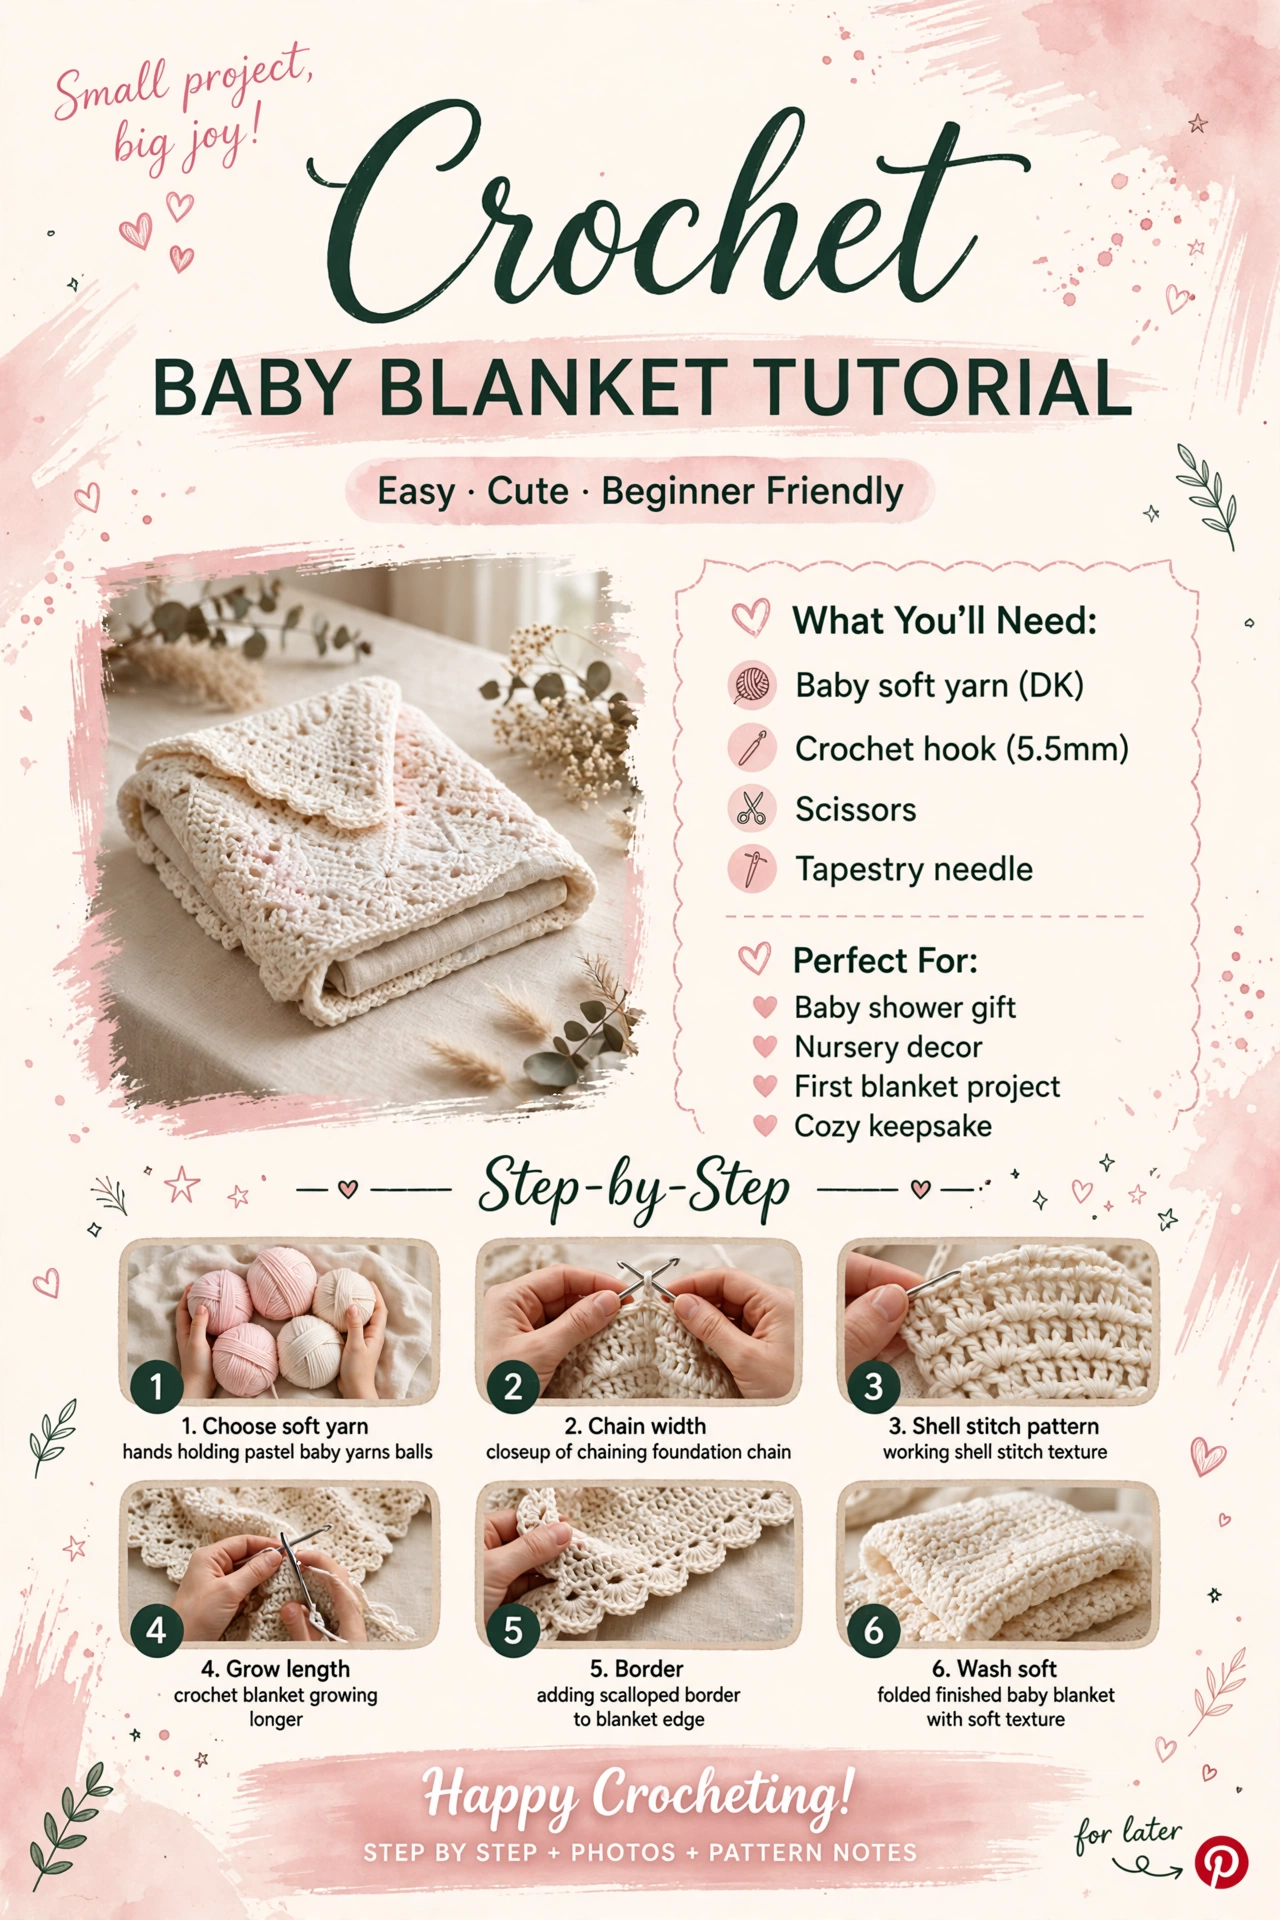
Complete tutorial roadmap
This blanket is built as a simple rectangle. You begin with a foundation chain, work the main body in an easy shell-stitch repeat, and finish the edges with a neat scalloped border.
The advantage of this construction is that you can easily adjust the blanket to make it smaller for a newborn, larger for a crib, or wider for a toddler-sized project. Once you understand the repeating stitch, the rest of the blanket becomes very relaxing to crochet.
- Choose your baby-friendly yarn and 5.5 mm crochet hook.
- Create the foundation chain.
- Work the first row of the blanket.
- Repeat the shell-stitch rows until the blanket reaches your desired length.
- Check the edges regularly to keep the rectangle straight.
- Finish with the scalloped border.
- Weave in the ends and gently block the finished blanket.
Materials & preparation
For a soft baby blanket, choose a yarn that feels comfortable against delicate skin. A washable DK-weight baby yarn is a practical choice because blankets are likely to need regular washing.
- DK-weight baby yarn
- 5.5 mm crochet hook
- Yarn needle
- Scissors
- Stitch markers
- Measuring tape
Choosing the blanket size
A useful starting size for a small baby blanket is approximately 30 × 36 inches, but the pattern is flexible. You can increase or decrease the width by changing the foundation chain as long as the chain works with the shell-stitch repeat.
If you want a smaller receiving blanket, begin with fewer stitches. For a larger stroller, crib, or toddler blanket, add additional stitch repeats before beginning the main rows.
Measure the blanket after several rows rather than relying only on the number of rows. Crochet tension can vary considerably from person to person.
Core pattern: easy shell stitch
The main texture comes from groups of stitches worked together to create gentle shell shapes. The shells give the blanket visual interest without requiring complicated techniques.
US crochet abbreviations
ch — chain
sc — single crochet
dc — double crochet
sl st — slip stitch
Foundation row
Chain a multiple of the number required by your chosen shell repeat, then add the turning chains needed for the first row.
Keep your foundation chain relaxed. Pulling the chain too tightly can cause the bottom edge of the blanket to become narrower than the rest of the project.
Row 1
Work your first row of stitches across the foundation chain, following the shell repeat. Place the stitches evenly so the shells develop consistently from one end of the blanket to the other.
Row 2
Turn your work and continue the shell pattern. Work each shell into the appropriate space from the previous row rather than accidentally placing stitches into the top of a neighboring shell.
Repeat
Continue repeating the shell rows. After every few rows, lay the blanket flat and check the edges. Correcting an uneven edge early is much easier than discovering the problem after the blanket is finished.
Important checkpoints
Troubleshooting common problems
Why is my blanket getting wider?
Extra stitches are usually being added at the ends of rows. Count your stitches periodically and make sure you are working the final stitch consistently at every row.
Why is my blanket getting narrower?
Missing the first or last stitch is a common cause. Mark the edges of your work while learning the pattern and check the stitch count every few rows.
Why don't my shells look even?
Check that each shell is being worked into the correct space. Uneven tension can also make some shells appear larger than others. Try to keep your working yarn tension relaxed and consistent.
My foundation edge is tight. What should I do?
If you have only completed the foundation, consider remaking it with a slightly looser tension. You can also use a slightly larger hook for the foundation chain before switching back to the main hook.
Adding the scalloped border
Once the blanket body has reached the desired size, work a simple edging around all four sides. A neat single-crochet foundation round can help stabilize the edge before creating the decorative scallops.
For the scalloped effect, work small groups of stitches at regular intervals around the blanket. Keep the corners balanced so the border does not pull or bunch.
Finishing the blanket
When the final border is complete, cut the yarn and secure the last loop. Use a yarn needle to weave the remaining tail through several stitches on the wrong side of the blanket.
Repeat with every yarn end. For a baby blanket, take extra care to make sure loose ends are securely woven in and trimmed.
Gentle blocking
Light blocking can help the blanket settle into a more even rectangle. Dampen the finished blanket according to the yarn manufacturer's care instructions, gently shape it on a clean flat surface, and allow it to dry completely.
Color ideas
This blanket works beautifully in soft neutrals, traditional pastels, or modern earthy shades. You can keep the entire blanket one color for a simple timeless look or introduce a second color for the border.
- Warm cream with a soft beige border
- Dusty pink with an ivory border
- Light sage with a cream border
- Baby blue with a white border
- Lavender with a pale neutral border
- Neutral beige with a contrasting scalloped edge
Ways to customize your blanket
Make it wider
Increase the foundation chain using the same stitch-repeat multiple. This is useful when making a crib or toddler blanket.
Make it longer
Simply continue repeating the main shell rows until the blanket reaches the desired length.
Use stripes
Change colors after a complete row to create horizontal stripes. Keeping color changes at row boundaries makes the finished blanket look neat and intentional.
Change the border
Replace the scalloped edge with a simple single-crochet border, a contrasting shell border, or several rounds of alternating colors.
Care & storage
Always follow the care instructions on the yarn label. If the yarn is machine washable, use the recommended gentle cycle and avoid excessive heat unless the manufacturer specifically permits it.
Store the blanket clean and completely dry. Folding it loosely rather than compressing it tightly helps preserve the stitch texture and shape.
Final notes
This baby blanket is a lovely project for practicing consistent tension, repeating stitch patterns, and neat finishing. The shell texture gives the blanket a handmade character while keeping the construction approachable for newer crocheters.
Most importantly, don't worry if your blanket looks slightly different from someone else's. Crochet tension, yarn composition, and hook choice all affect the finished fabric. The goal is a soft, comfortable blanket with an even shape and secure finishing.
Save this tutorial for your next baby gift project and explore the other free crochet tutorials here at Sara Rain Crochet.