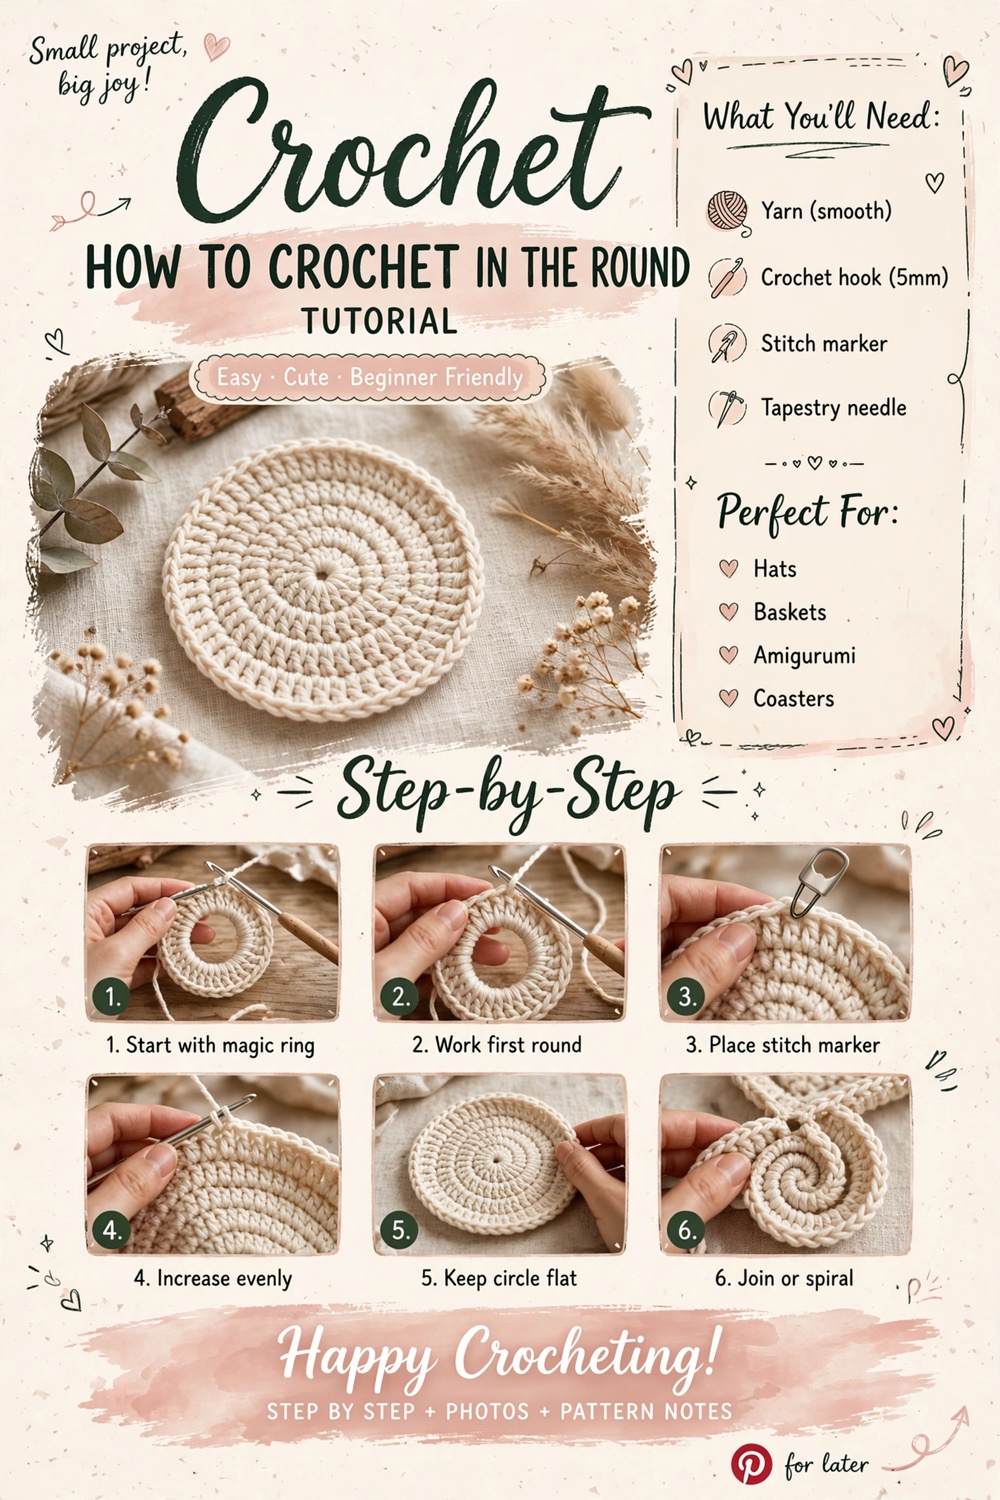
Make a flat six-round circle by increasing at regular intervals.
Work through the guide in order and use the checkpoints before moving to the next stage.
Materials & preparation
Before you start
Set out your yarn, hook, scissors and needle. Read the complete instructions once before making the first stitch. Write down any target stitch count or finished measurement so you can check your work as you go.
Gauge & tension
Your yarn, hook and personal tension determine the finished fabric. When size matters, make a small swatch and let it rest flat before measuring. Do not force your hands to match a number by gripping the hook harder.
Core pattern / method
Materials
- Worsted yarn, 30 yd / 27 m
- 5 mm hook
Abbreviations
MR = magic ring · sc = single crochet · inc = increase · sl st = slip stitch
Pattern
- Round 1: MR, 6 sc. 6 st.
- Round 2: Inc in each st. 12 st.
- Round 3: [Sc 1, inc] around. 18 st.
- Round 4: [Sc 2, inc] around. 24 st.
- Round 5: [Sc 3, inc] around. 30 st.
- Round 6: [Sc 4, inc] around. 36 st.
- Finish: Sl st, fasten off and weave in ends.
Flat-circle check
If the circle cups, add increases more often. If it ruffles, use fewer increases. Even tension also matters.
Checkpoints while you work
Pause at the end of every row, round or major step and compare your result with the instructions. Check the stitch count, shape and tension before continuing. If something changes unexpectedly, fix it while the correction is still small.
Troubleshooting
The finished shape looks different
Check stitch count, yarn weight, hook size and tension in that order. A small difference in any one of these can change the finished fabric. Correct construction first; use blocking only for final shaping.
My stitches feel inconsistent
Slow down for one row, relax your shoulders and keep the hook movement small. Consistency improves when the hand motion becomes repeatable, not when you pull the yarn tighter.
I made a mistake several rows back
Find the first wrong stitch, unravel only to that point and rebuild the section. Carrying an incorrect stitch forward usually makes the final repair harder.
Finishing the project
Take time to secure every tail, straighten the edges and shape the finished piece. Weave tails through several stitches in one direction, change direction and trim only after the yarn is secure. If the project benefits from blocking, follow the fiber care instructions and let it dry completely.
Variations & next projects
Once the base version feels comfortable, change one variable at a time: color, yarn weight, hook size, border or finished dimensions. Keeping the rest of the method unchanged makes it easier to understand what each change does.
Repeat the same construction in a new color palette or size before moving to a completely different technique. This is one of the fastest ways to turn a tutorial into a skill you can reuse.
Care & storage
Follow the yarn label for washing and drying. Store finished crochet clean and completely dry. For frequently handled items, inspect seams, joins, straps and hanging loops occasionally and repair a loose end before it becomes a larger problem.
Final notes
You do not need a perfect first attempt. The real skill is learning to read your fabric, count your work and make a small correction when something changes. Keep the finished piece as a reference for future projects and note the yarn, hook and adjustments that worked well.
Flat-circle practice pattern
Sample yarn: cotton #3–4 · Hook: 4 mm · Finished size: about 8–10 cm (3–4 in) after 4 rounds, depending on tension.
Abbreviations
ch = chain · sc = single crochet · sl st = slip stitch · inc = increase · rnd = round.
Numbered pattern
- Rnd 1: Make a magic ring and work 6 sc into it. (6)
- Rnd 2: Inc in every stitch. (12)
- Rnd 3: [sc, inc] around. (18)
- Rnd 4: [2 sc, inc] around. (24)
- Join with a sl st when using joined rounds, or continue into the next stitch for continuous rounds.
Shape checkpoint
Lay the circle flat after every round. Cupping usually means the fabric needs more width; strong rippling can mean the increase rate is too high for your yarn and tension. Check the pattern before changing it.
Finishing & care
Mark the first stitch of each round and record the final count. Wash and dry according to the yarn label.